PORTRAIT PLANNING · HOME DISPLAY GUIDE
How to Display Your Portraits at Home
South Shore Photography, based in Rockland, MA, helps families, seniors, and individuals across the South Shore create portraits worth displaying for a lifetime. Photographer Chris McCarthy shares practical guidance on how to choose, print, frame, and display your portrait photography at home.
The portrait session is only the beginning. The images end up on your phone, on your laptop, in an online gallery — and for a lot of families, that's where they stay. I've started asking every client at the end of their gallery review: “What are you going to print?” Not because I want to sell anything, but because I've seen too many genuinely beautiful portraits of families sit unopened in digital folders while the only framed photo on the wall is from five years and one haircut ago. Here is how I think about displaying portrait photography at home.
The Case for Printing — Why Digital Files Aren't Enough
Digital files on a hard drive are invisible. Printed portraits are not. That sounds obvious, but it's the core of everything I want to say here. A photograph only does its emotional work when it can be seen — when it catches your eye as you walk past the living room, when your kid notices it on their bedroom wall, when a visiting grandparent picks up an album and quietly goes through it page by page. None of that happens with a JPEG in a cloud folder.
The emotional value of a portrait isn't accessed by logging into a gallery. It's accessed by walking past it every day. There's real research on this: photographs displayed in the home are more likely to be talked about, more likely to be associated with specific memories, and more likely to reinforce family identity than photographs stored digitally. The physical presence of an image in your home creates a kind of ongoing conversation that a screen-based file simply cannot replicate. If you are still in the planning stage, the complete guide to family portraits on the South Shore covers everything from booking through gallery delivery.
I hear a version of the same thing every few months from families who booked sessions two or three years back. They log back into their online gallery, start scrolling, and realize with some surprise just how beautiful the images are — and how little they've looked at them. The best portrait I've ever made for a family is the one they never printed. That's a pattern I see too often, and it's one I try to interrupt as early in the process as possible.
There's also a simple value argument. You paid for the session — the time, the location, the editing, the gallery delivery. That investment is largely invisible if the images live permanently on a screen. Printing costs a fraction of the session fee and delivers most of the long-term value. A 24x30 canvas on your living room wall that you see every day for twenty years is an extraordinary return on what it costs. A JPEG on a laptop that you open twice a year is not.
Wall Art Options — What Works in South Shore Homes
The South Shore has a pretty identifiable residential aesthetic — colonial and cape-style homes with neutral walls, wood floors, and a mix of traditional and transitional furnishings. The wall art choices that work best here are not the same ones that work in a downtown Boston loft or a mid-century modern in Newton. Here is how I think about the main options.
Canvas gallery wraps are durable, versatile, and the right choice for most casual display spaces — living rooms, family rooms, bedrooms, hallways. The canvas texture gives the image warmth and depth, and the gallery wrap format means no additional framing is required. They hold up extremely well over time and look appropriate in virtually any South Shore home.
Fine art prints in frames are more formal and more traditional. Printed on archival photographic paper and mounted inside a frame with mat board, these are the standard choice for entry halls, dining rooms, and anywhere the aesthetic leans toward the classic rather than the casual. They are also the heirloom-quality choice — the format most likely to be passed down and displayed for generations.
Metal prints look striking in modern, contemporary spaces, but they are genuinely not a fit for most traditional South Shore colonial interiors. The cool, high-gloss finish reads as sleek and industrial — which is exactly right for some homes and completely wrong for others. I'd steer most South Shore clients away from metal unless their home has a specifically contemporary design direction.
Framed multi-panel sets — typically a triptych of three related images from the same session displayed in a row — are very popular with family portrait clients. They let you tell a small story: a candid, a posed group, a detail shot. Three 8x10s in matching frames over a console table or above a sofa is a classic arrangement that works in almost any South Shore home.
On sizing: for a primary display wall, nothing smaller than 20x24. A 30x40 makes a real statement. A 16x20 on a large wall looks like an afterthought — like you meant to get a bigger print and ran out of motivation. I've watched families agonize over whether to go from a 20x24 to a 24x30, then hang the 24x30 and immediately wish they'd gone to 30x40. When in doubt, go up a size.
Gallery Wall Design Principles
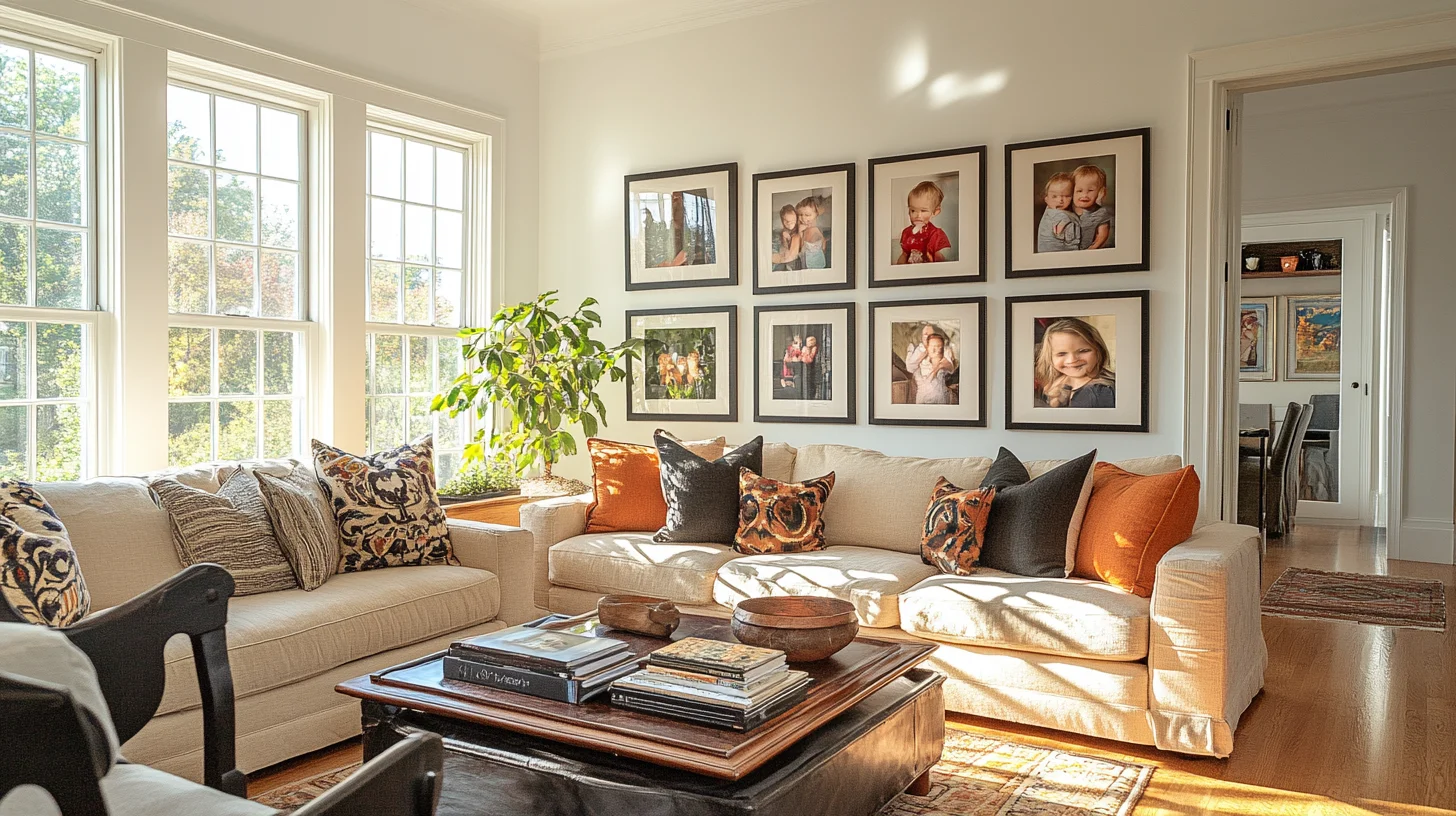
A gallery wall — a curated arrangement of multiple framed images on a single wall — is one of the most effective ways to display portrait photography at home, and one of the most frequently botched. The difference between a gallery wall that looks intentional and one that looks chaotic usually comes down to a handful of principles.
Odd numbers of frames look more natural than even numbers. Three frames, five frames, seven frames — odd groupings have a visual balance that even groupings, which tend to feel either too symmetric or too paired, don't. This isn't an absolute rule, but if you're starting from scratch and unsure, start with three or five.
Mix portrait and landscape orientations. An arrangement of all vertical frames or all horizontal frames reads as monotonous. Mixing the two creates visual rhythm and lets you vary the content — a horizontal landscape, a vertical close-up portrait, a square detail image — in a way that feels more like curation and less like a grid.
Consistent frame color creates cohesion. All black frames, all white frames, all walnut frames — staying within one frame finish lets you vary print sizes without creating visual chaos. The consistency in framing signals that the arrangement was intentional. Mixing frame finishes within a single wall usually reads as random rather than eclectic.
The largest piece anchors the arrangement. Position your hero image first — centered at roughly eye level, 57 to 60 inches from the floor to the center of the image — and build the rest of the arrangement outward from there. Leave 2 to 3 inches between frames. Lay the full arrangement out on the floor before committing to the wall.
On South Shore interiors specifically: white and light neutral walls pair well with warm wood frames — walnut, natural oak, lighter maple tones. If you have a navy or deep charcoal accent wall (which has been popular in South Shore homes for the past several years), warm walnut frames and warm-toned portrait prints create a striking combination. Avoid cool-finish frames on warm-toned walls — the clash undermines both.
Albums — The Underrated Option
Albums get less attention than wall art in most conversations about displaying portrait photography, and I think that's a mistake. A well-made album is, in many ways, the most durable and intimate format for portrait photography — and the one most likely to actually be used over time.
Albums get taken out. They get passed around at family gatherings. They get handed to grandparents who spend twenty minutes quietly going through them. They end up on a coffee table where visiting friends pick them up without prompting. That kind of engagement doesn't happen with a digital gallery, and it happens only occasionally with wall art. Albums invite interaction in a way that framed prints don't.
The 10x10 heirloom album included with senior portrait packages is designed specifically for this kind of use: archival paper, lay-flat binding, a durable cover that holds up to handling, and a format that feels substantial without being precious. Senior portrait clients who display their album on a side table in the living room consistently tell me it's one of the most-commented-on objects in the room.
Family portrait albums don't need to be elaborate. A simple flush-mount album with 20 to 30 images from a single session tells the complete story of that day in a form that's easy to hand to anyone and immediately engaging. You don't need to explain an interface or log in anywhere. You just open it.
There's also a plain resilience argument: albums survive when hard drives don't. I've had clients come back to me years later because their backup drive failed and they lost their digital files. The families who had albums still had their portraits. The families who relied entirely on digital storage sometimes didn't. An album also makes an extraordinary portrait session gift — for grandparents, for a partner, for a graduate heading to college.
What Portraits Should You Display Where?
Not every portrait is right for every room, and thinking intentionally about placement makes both the images and the rooms more meaningful. Here is how I think about matching portraits to spaces.
Entry hall. This is the first thing people see when they walk into your home, and it sets the tone for the whole house. A bold, welcoming portrait — a strong family portrait, a large single image — belongs here. The entry hall is a public space; display something with presence and warmth.
Living room. The living room is where the family portrait wall lives. This is the most seen room in the house, the space where family identity is most on display. A gallery wall anchored by your best family portrait, or a large statement canvas over the sofa, tells the story of your family to everyone who enters.
Kids' rooms. Individual portraits of that child — ideally at multiple ages — create something genuinely powerful in a child's room. Seeing themselves reflected on their own walls is meaningful in ways that are hard to overstate. I've had parents tell me their kids ask about their portraits, compare themselves to earlier images, point them out to friends. That sense of being seen and documented matters to children. Browse the portrait gallery to see examples of images families display in their homes.
Primary bedroom. Maternity portraits and romantic couple portraits belong in the primary bedroom — private, meaningful, intimate. These images are personal in a way that doesn't need to be on display for guests, and the bedroom is exactly the right context for them.
Office or workspace. A professional headshot or branding portrait displayed in a home office or workspace is both practical — it reminds you of how you want to show up professionally — and motivating. It's also useful for video calls: a well-chosen portrait visible in your background communicates credibility without any effort.
The underlying principle in all of this: think about who will see the image, and in what context. The most meaningful displays are the ones where the right image is in the right room for the right audience — not just wherever there happened to be wall space.
Frequently Asked Questions
What size print should I order for my living room wall?
For a primary living room wall, start at 20x24 as an absolute minimum — smaller than that tends to look like a snapshot rather than a piece of art. A 24x30 or 30x40 makes a genuine statement on a standard wall. For a large-scale feature wall, a 30x40 or larger canvas gallery wrap creates the kind of presence that becomes the focal point of the room. When in doubt, go larger. Most people underestimate how big prints need to be to look intentional on a full-size wall.
What is the difference between a canvas print and a framed fine art print?
A canvas gallery wrap is printed on canvas and stretched over a wooden frame — no additional framing needed. It has a casual, contemporary feel and is durable enough for any room in the house. A framed fine art print is printed on archival photographic paper and mounted inside a frame — more formal, more traditional, and the standard choice for heirloom-quality display. Both can look beautiful; the choice depends on your home's aesthetic and which rooms you're displaying in.
How do I start a gallery wall at home?
Start with the largest piece and position it at eye level — roughly 57–60 inches from the floor to the center of the image. Work outward from there, leaving 2–3 inches between frames. Lay the arrangement out on the floor first before putting holes in the wall. Use consistent frame colors across the wall for cohesion even if the print sizes vary. Paper templates taped to the wall let you experiment with layouts without committing.
How long do printed portraits last?
Archival-quality photographic prints — the standard used by professional print labs — are rated for 100+ years under normal display conditions. Canvas gallery wraps are similarly rated. The main threats to print longevity are prolonged direct sunlight (causes fading), high humidity (affects paper), and UV exposure through windows. For portraits displayed in normal interior light away from direct sun, archival prints will last generations.
Can South Shore Photography help me choose and order prints from my session?
Yes. After your gallery is delivered, I offer an optional ordering consultation — we review your gallery together and I help you select and size images for your specific walls. I work with a professional print lab that produces archival-quality products, and I can advise on frame and mounting options that work with your home's style. Many clients find that having guidance makes the printing process much less overwhelming. Get in touch to learn more about the ordering consultation.
PRO TIP
“The question I ask every family at the end of their gallery review: which of these would you print if you knew it was going to hang in your living room for the next twenty years? That framing changes everything. Usually one or two images immediately become obvious.”
Book Your Portrait Session
Ready to create portraits worth displaying? Reach out to check availability for family, senior, and individual sessions across the South Shore.

ABOUT THE AUTHOR
Chris McCarthy is a portrait photographer based in Rockland, MA who has been photographing the South Shore full-time since opening his studio in 2014 — more than a decade of outdoor and lifestyle portrait work across the region. He specializes in headshots, senior portraits, branding, family, and maternity photography — shooting at his studio at 83 E Water Street and on-location throughout southeastern Massachusetts at places like World's End, Scituate Harbor, Duxbury Beach, and the North River conservation land in Norwell.
More from the Blog
SESSION GUIDE
What to Expect at an Outdoor Family Portrait Session
A walkthrough of the full session experience — from arrival to gallery delivery — so your family knows exactly what to expect.
SEASONAL GUIDE
Fall Family Portrait Tips for the South Shore
Timing, locations, and styling secrets for fall family portrait sessions on the South Shore — from a working local photographer.