PHOTOGRAPHY BASICS · POSING
Basic Posing for Non-Models — How to Photograph Real People Without Making It Awkward
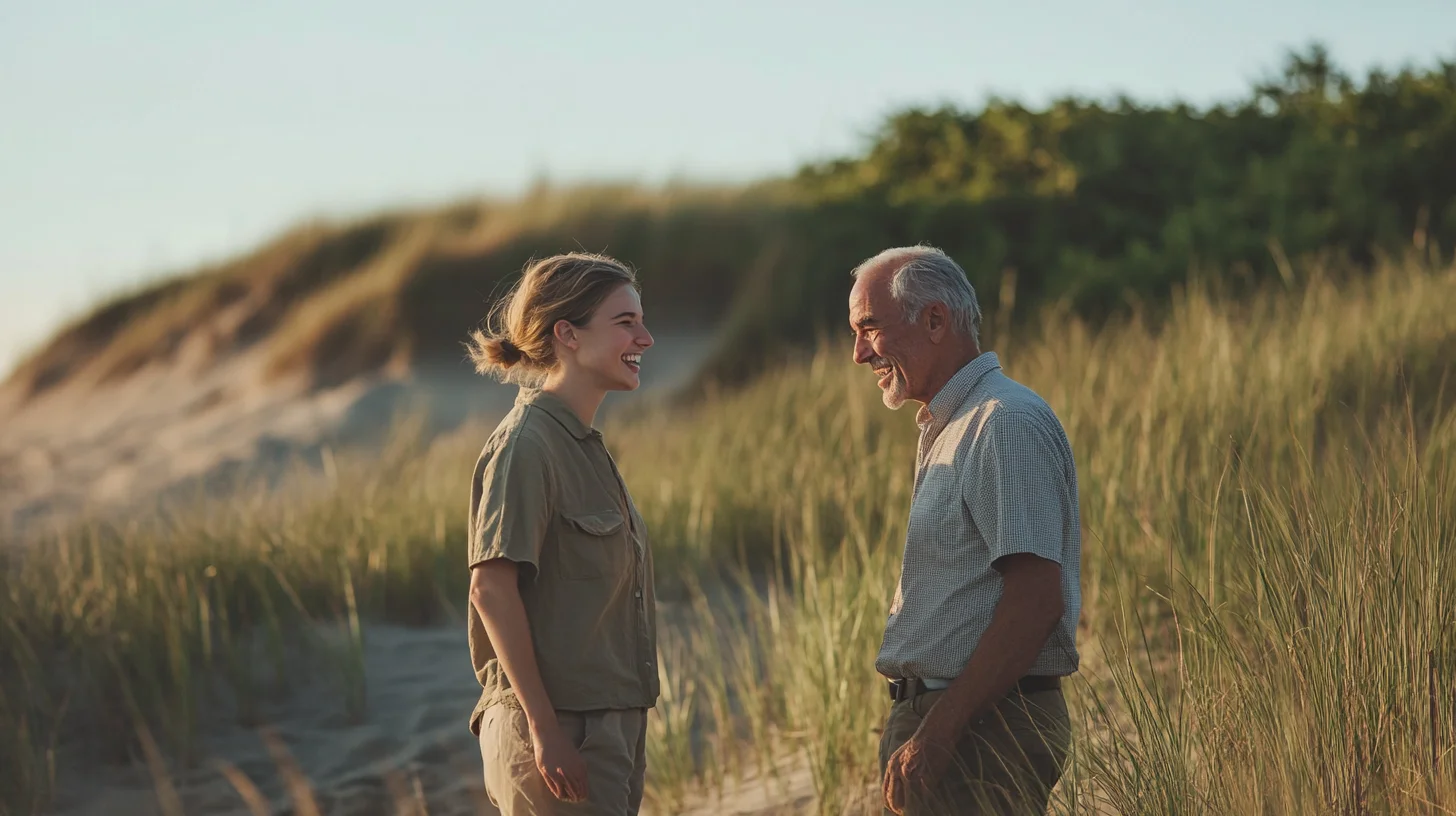
South Shore Photography, based in Rockland, MA, serves individuals, couples, and families across Hingham, Scituate, Norwell, Duxbury, Marshfield, Cohasset, Hanover, Weymouth, and Plymouth. Most of the people photographer Chris McCarthy photographs have never worked with a photographer before — which means posing is always part of the job.
The vast majority of people I photograph are not models. They are attorneys from Hingham, teachers from Marshfield, parents from Norwell, small business owners from Scituate — people who spend their days doing things that have nothing to do with standing in front of a camera. And when you put a non-model in front of a camera and ask them to look natural, something very predictable happens: they freeze. Their arms go stiff, their smile goes rigid, and they stare into the lens like they are waiting to be told what to do next. Which, of course, they are. Posing is the photographer's job, not the subject's. In a decade of photographing people outdoors across the South Shore, I've built a set of fundamentals that work on almost anyone. Here they are.
Why “Act Natural” Is the Worst Direction You Can Give
Let's start with the root of the problem. When most people — photographers included — don't know what to say to a subject, they default to some version of “just be yourself” or “act natural.” This is useless direction, and it almost always makes things worse.
The reason is simple: being photographed is not a natural state for most people. It is a performance situation with an audience of one and no script. When someone hears “act natural,” their brain tries to locate what “natural” looks like from the outside, which is impossible — we have no direct experience of what we look like to other people in real time. So they guess, and the guess is usually a stiff, self-conscious approximation of what they think a normal person looks like standing still. It is not natural. It just looks more intentionally unnatural.
The fix is to replace vague evaluative direction (“look more relaxed,” “smile more naturally”) with specific physical instructions. “Shift your weight to your back foot” is easy to execute. “Drop your left shoulder a half-inch” is easy to execute. “Look just past my left ear” is easy to execute. Each of these produces an observable physical change that you can see in the frame, and none of them require the subject to evaluate how they look, which is exactly the mental loop you want to interrupt.
I spend the first few minutes of every portrait session — whether it's a professional headshot at World's End in Hingham or a lifestyle shoot along the North River in Norwell — just giving people small, specific physical directions and letting them build confidence executing them. By the time we get to the frames I actually care about, the subject is in a rhythm of responding to direction rather than performing at a camera.
Weight Distribution — The Single Biggest Improvement You Can Make
If I could fix only one thing in every portrait session, it would be how the subject is standing. The default non-model stance is weight equally distributed on both feet, body facing square-on to the camera, arms at sides. It is the posture of someone waiting for a bus, and it produces a flat, static silhouette that is almost universally unflattering regardless of body type or face shape.
The fix is two moves: angle the body about 30 degrees away from the lens, then shift weight to the back foot. That's it. Those two adjustments create depth in the frame by showing the subject in three dimensions rather than flat, slim the visual profile by reducing the square-on silhouette, and create a slight natural lean of the torso that reads as relaxed and confident rather than rigid.
The weight shift is especially important. When weight is on the back foot, the front knee bends slightly, the hip pops gently, and the whole body finds a natural resting position rather than the locked-knee military brace of someone standing at attention. For seated poses, the equivalent is having the subject sit on the front third of the seat rather than all the way back — it naturally brings the torso forward, engages the core slightly, and prevents the slumped-back look that flat seating produces.
I use this on everyone. The attorney who has never been photographed professionally, the mom who thinks she “doesn't photograph well,” the teenager who is mortified to be there — weight shift and body angle works on all of them, because it is a physical adjustment that produces an objective visual improvement regardless of what the subject is thinking or feeling.
Hands — The Universal Problem and Five Solutions
Hands are where portraits go wrong most often, and the reason is that hands are expressive, difficult to control, and impossible to hide. When a subject is nervous, their hands telegraph it immediately — stiff fingers pressed against thighs, fists, awkward half-gestures that go nowhere. Most subjects have no idea what to do with their hands, and left to their own devices they will do something that photographs poorly.
The solution is to give hands something specific to do. Here are the five I use most:
1. One hand in a pocket. Simple, classic, and effective. One hand in a pocket reads as relaxed and casual, especially for men and for lifestyle outdoor sessions. The key is one hand — both hands in pockets looks like the subject is cold or hiding something. With one hand in and one hand loose at the side (with soft, relaxed fingers rather than a stiff fist), the whole pose reads as easy and natural.
2. Arms at the side with intentionally relaxed fingers. This sounds simple but requires active direction. Most people, when told to let their arms hang naturally, will tense their fingers without realizing it. I specifically instruct subjects to shake out their hands and then let them fall with fingers softly curved — not splayed, not pressed together, just resting. The difference between tense fingers and relaxed fingers in a portrait is significant and immediately visible.
3. Holding something. For outdoor lifestyle sessions along the South Shore coast — Scituate Harbor, Duxbury Beach, the Norwell conservation trails — I'll often hand a subject something to hold: a jacket draped over one arm, a coffee cup, sunglasses in one hand. Having an object gives the hands a purpose and immediately eliminates the awkward “what do I do with these” quality. It also makes the portrait read as a moment rather than a pose.
4. Hands on hips. Used correctly, hands on hips conveys confidence and takes up space in a way that reads as strong rather than aggressive. The common mistake is pressing the full palm flat against the hip, which looks stiff. Instead, I direct subjects to rest just the fingertips or the back of the hand lightly on the hip — a soft contact rather than a grip. For women especially, pairing this with the weight shift and hip pop produces a silhouette that is universally flattering.
5. A gentle gesture mid-movement. This is less a static pose and more a moment captured — hands moving through the frame naturally as the subject shifts, turns, or laughs. I'll often produce this by giving the subject a direction that requires them to move (“turn toward me while you walk”) and shoot during the movement rather than at the end of it. The hands fall naturally when the body is in motion, and the resulting frames have an authenticity that no static hand placement can replicate.
Shoulders, Head, and Eyes — The Details That Make or Break the Frame
Once weight and hands are handled, I move up the body. Shoulders are next, and they matter more than most people expect.
Square shoulders to the camera communicate power and directness — which is the right read for some subjects and some contexts, but it reinforces the flat silhouette problem discussed above. For most outdoor portrait work, I prefer a slight angle: one shoulder slightly closer to the camera than the other, the torso following the body angle. This creates a more dynamic frame and a more flattering silhouette without losing presence.
Head position is where a lot of subjects make an unconscious mistake: they pull their chin back and slightly upward, which is a defensive posture that compresses the neck and creates unflattering shadows under the jawline. The correction is counterintuitive. I ask subjects to bring their chin forward — not up, forward — and then slightly down. This extends the neck, defines the jawline, and creates separation between face and shoulder that reads as confident and alert. It feels awkward to the subject but photographs remarkably well. I sometimes describe it as “making a turtle head” which produces enough confusion and amusement that they do it correctly.
For eye direction: direct eye contact into the lens produces connection and presence. It is the right choice when you want the subject to look engaged and confident — standard for professional portraits. Looking slightly off-camera, toward a fixed point just past the lens or toward something in the environment, produces a more contemplative and editorial quality. I shoot both in every session and let subjects see the difference. Most people prefer direct contact for professional use and slightly off for lifestyle images, but it varies. The one thing to avoid is an unfocused drift — eyes that appear to be wandering rather than intentionally looking at something specific always read as distracted.
Movement, Breath, and How to Capture Natural Moments
The most flattering portrait is usually not the one taken at the end of a pose — it is the one taken during the transition into or out of it. Movement catches subjects in a state of doing rather than performing, and the difference is visible in the frame.
One technique I use consistently: shooting between exhales. Before capturing a key frame, I'll ask the subject to take a breath and then let it out slowly. At the end of the exhale — when the body is fully relaxed and before the next breath creates tension — I shoot. The resulting frames consistently show softer expression, relaxed shoulders, and a more settled quality than frames taken at random in the breathing cycle. It sounds like a small thing, but over thousands of sessions it has proven reliable enough that I teach it to every subject.
Walking poses are invaluable for subjects who freeze when standing still. I'll position myself about 20 feet away and ask the subject to walk toward me at a relaxed pace, looking at me as they approach. I shoot continuously through the walk, and somewhere in those frames — usually around the fourth or fifth step — the subject stops thinking about posing and just walks. Those frames have an authenticity that is almost impossible to produce any other way. Along the North River conservation paths in Norwell or the carriage roads at World's End in Hingham, walking poses also use the environment naturally, producing portraits that feel like they belong in the location rather than shots of someone standing in front of a nice backdrop.
I also capture a lot of frames during genuine reactions: the moment after a joke lands, the second after I say something absurd, the transition between one setup and the next when the subject is talking to a companion or looking at their phone. These are not candid frames — I am deliberately positioned and focused — but they capture genuine expression rather than performed expression. For subjects who truly struggle to produce natural smiles on command, manufacturing a genuine laugh through conversation is far more effective than directing them to smile differently.
Direction Language That Actually Works
The specific words you use as a photographer matter more than most people realize. Some phrases produce predictable, useful results. Others produce exactly the opposite of what you intended.
Phrases that work: “Shift your weight to your back foot.” Clear, executable, specific. “Bring your chin forward and a tiny bit down.” The word “tiny” prevents overcorrection and signals that you're making a small adjustment, not a dramatic change. “Imagine you just heard something that surprised you in a good way.” This produces a genuine, slightly open expression that reads as warm and approachable without requiring a forced smile. “Tell me one thing you're looking forward to this weekend.” The act of genuinely thinking about something produces real eye movement, real expression, and a momentary break from self-consciousness that I can capture.
Phrases that don't work: “Smile more naturally” (how?), “Just relax” (if I could do that, I would), “You look great” after every frame regardless of whether it's true (subjects can tell, and it erodes trust in your direction). I try to save genuine positive feedback for frames that genuinely earn it — when it comes, subjects know it means something.
One of the most effective things I do in every session is show the subject a good frame early — usually within the first ten minutes. I'll pull up a strong image on the back of the camera and say, “Look at this one — this is what we're working with.” Most subjects who think they “don't photograph well” have built that belief on a handful of bad phone photos or unflattering candids. Showing them an actually good frame early in the session resets that belief and fundamentally changes how they engage with the camera for the rest of the shoot. The difference in the following frames is immediate and dramatic every time. If you specifically need this for a teenager about to do a senior session, senior-session pose language adapted for non-model teenagers adapts the same principles to senior-session pacing and outfit changes.
Frequently Asked Questions
What is the most common posing mistake for non-models?
Standing square-on to the camera with weight evenly distributed on both feet. This creates a flat, static silhouette that is almost universally unflattering. The single fastest improvement is asking the subject to shift their weight to their back foot and angle their body about 30 degrees away from the lens. That one change creates depth, slims the frame, and immediately looks more intentional.
How do I help someone who hates being photographed?
Keep them moving. People who hate being photographed hate the feeling of being frozen and stared at. Walking poses, turning toward you mid-stride, crouching to look at something in the environment — all of these break the static “pose” feeling and give the subject something to do besides be self-conscious. I also show people a good frame early in the session so they can see they look fine, which immediately lowers the anxiety level. Reassurance backed by evidence works far better than just telling someone to relax.
Are there poses that always work on any subject?
A few fundamentals are close to universal: weight on the back foot with a slight body angle, one hand doing something specific (in a pocket, resting on a surface, or loosely at the side with relaxed fingers), chin slightly forward and down to define the jawline, and eyes toward the main light source. These four adjustments alone will produce a flattering result on almost any subject. From there you adapt based on the individual — their comfort level, body type, and the mood of the shoot.
How do I give posing direction without making someone feel self-conscious?
Use specific physical directions rather than evaluative ones. “Shift your weight to your back foot” is easy to execute and feels neutral. “You look stiff” is an evaluation that raises anxiety. Similarly, instead of “smile more naturally,” try “think about the last time something surprised you in a good way” — that produces a real expression rather than a performed one. The more your direction sounds like a stage instruction rather than a judgment, the more comfortable your subject will be.
Should my subject look directly at the camera or slightly away?
Both have a place. Direct eye contact into the lens produces connection and intensity — it is the right choice for professional portraits where you want the subject to feel present and confident. Looking slightly off-camera produces a more contemplative, editorial feel. I typically shoot a mix in every session and let the client decide which read they prefer. The key is that off-camera gaze must look intentional — eyes wandering mid-shot just reads as distracted.
PRO TIP
“Your job as the photographer is to make every decision so the subject doesn't have to make any. The moment you ask a non-model to choose how to stand or where to look, you've handed the hardest part of the shoot to the person least equipped to handle it.”
Book a Portrait Session on the South Shore
Ready to experience what professional direction actually feels like? South Shore Photography serves individuals, families, and professionals across Hingham, Scituate, Norwell, Duxbury, and beyond.
PILLAR GUIDE
The Complete Guide to Photography Basics on the South Shore
This post is part of the photography basics series. For the full overview — exposure, composition, gear, light, and everything in between — read the complete pillar guide covering all the fundamentals in one place.
Open the South Shore photography basics pillar →
ABOUT THE AUTHOR
Chris McCarthy is a portrait photographer based in Rockland, MA who has been photographing the South Shore full-time since opening his studio in 2014 — more than a decade of outdoor and lifestyle portrait work across the region. He specializes in headshots, senior portraits, branding, family, and maternity photography — shooting at his studio at 83 E Water Street and on-location throughout southeastern Massachusetts at places like World's End, Scituate Harbor, Duxbury Beach, and the North River conservation land in Norwell.
Continue learning the fundamentals
Each spoke of the basics guide goes deeper on one technical foundation. Read whichever one you need next.
COMPOSITION
Composition Fundamentals for Portraits
Rule of thirds, leading lines, framing — composition that makes a portrait feel intentional.
LIGHT DIRECTION
Natural Light Direction for Portraits
Front, side, back, top — how each direction shapes the face and what to choose when.
LENS CHOICE
Focal Length Basics for Portraits
Why 85mm flatters faces and 35mm tells a wider story — choosing focal length per shot.
BACKGROUNDS
Finding Clean Backgrounds on the South Shore
Where to look — and what to avoid — when scouting clean portrait backgrounds locally.
COLOR
White Balance & Color Temperature
Warm vs cool, golden hour vs blue hour, and how to keep skin tones honest in mixed light.
More from the Blog
SERVICE
Family Portraits — South Shore
Posing applied to South Shore outdoor family sessions →
SERVICE
Professional Headshots — South Shore
Subtle posing direction in real headshot sessions →
PHOTOGRAPHY BASICS
The Exposure Triangle Explained for Beginners
Aperture, shutter speed, and ISO — how the three work together and how to stop guessing and start controlling your camera.
BEGINNER GUIDE
Common Beginner Photography Questions — South Shore Edition
Answers to the questions new photographers ask most often, with South Shore locations and conditions in mind.